A day in Bristol

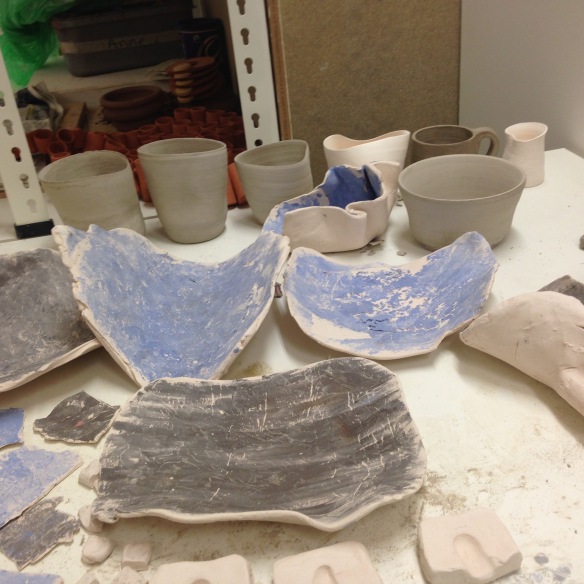
So yesterday our year group form Ceramics went to Bristol and visited the Ken Stradling gallery. This is part of a project which we started in first term… we explored Stradling’s collection and picked an item of inspiration, as a starting point, my starting point being an Arne Jacobsen chair. We took our work to the gallery to have it photographed by Toril Brancher alongside the original source of inspiration.

IMG_2146

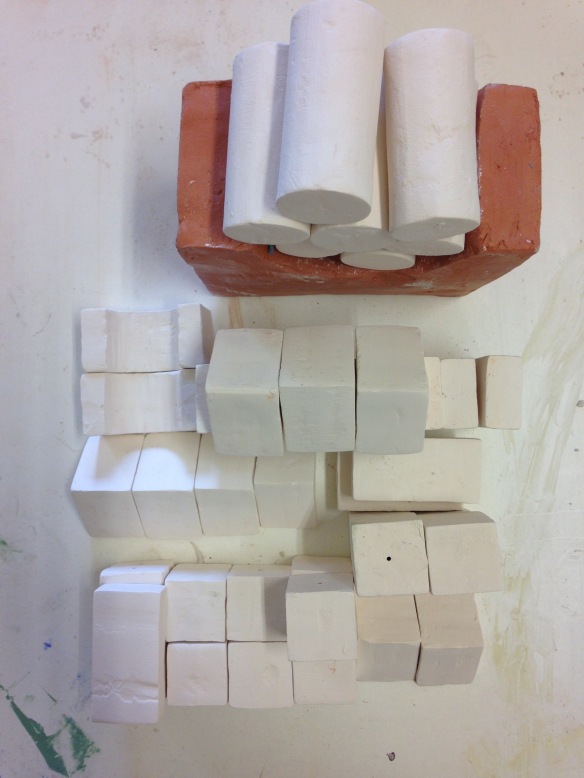
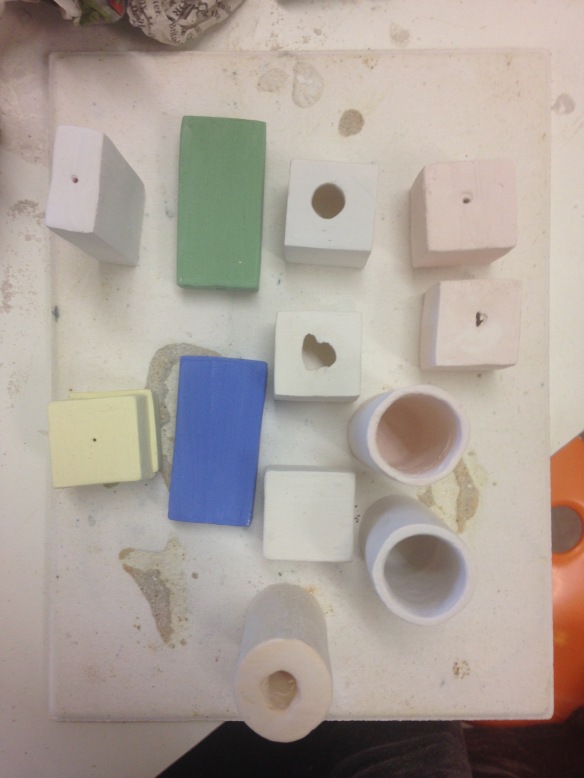
I took this picture on the table that Jon, Fintan and Connor made during our Fo[u]r Rooms project, I think the stained scaffold planks really compliment the bright colours of my blocks, and of course, the toned down bisque terracotta brings the bright ceramic and textured brown of the wood together.

IMG_2173

Interestingly as we left the gallery, I looked across the road and there they were! More Jacobsen chairs sitting outside a cafe. We were given different time slots for our photographs, I was in the last group of people, so we had a few hours to kill, which involved browsing in a bookshop, sunbathing and eating lunch.

IMG_2205

Some new books I found from The Last Bookshop.. They buy in remaining stock so I managed to get four books for ten pounds! Bargain- I always prefer buying from locally run shops too than the massive chains, so it was a win-win!

IMG_2176

A shot taken of the Bristol uni law building… a group of us were lying on a patch of grass soaking up the gorgeous sun rays.

IMG_2196

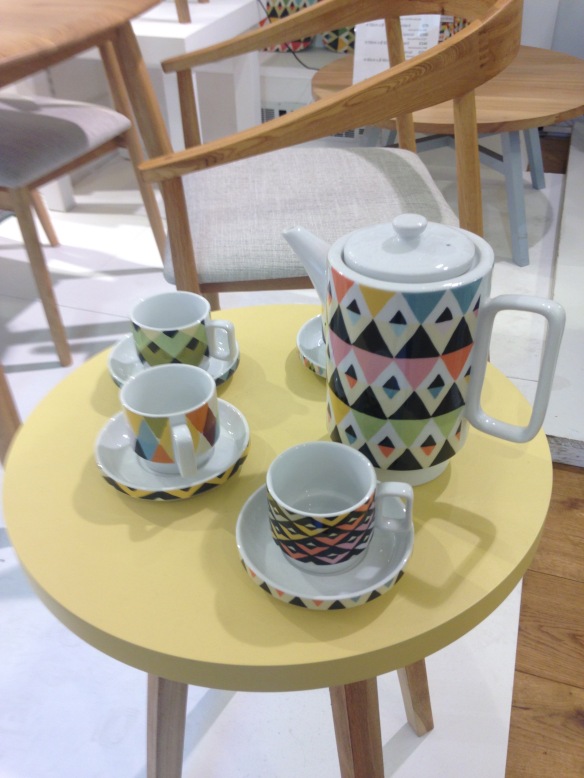
The most wonderful tea set displayed at the Bristol Guild- which is connected to Ken’s gallery- The Viva range is a collaboration between Magpie and Sarah Campbell. What’s even  better is that the collection is eco-friendly. Who could say no to these fab geometric patterns?!

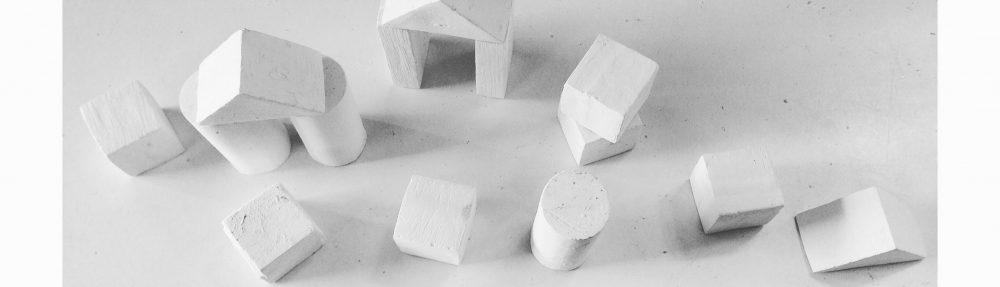
It’s a real privilege to be able to have my work photographed here, especially with such well established artists and designers work. I placed my building blocks on a Marcel Brauer desk to begin with, on the top floor of the gallery as I wanted to show in my photograph that people could touch them, and after all people sit at a desk to engage in whatever they have placed on the desk.

IMG_2179

Since my inspiration came from the Arne Jacobsen chairs, I also wanted my blocks photographed on the chairs. The action of stacking is a feature both in the chairs and my building blocks, so I placed them on a stack of 3 blue chairs. Interestingly, the colour of the chairs gave my blue building blocks the dominance, bringing a new perspective to the piece.

When Toril was taking pictures, she made some very interesting points: “The best person to photograph your work is you…Because it’s the photographs which sell your work.” And that “Whatever you do, take pictures everyday”.  Julia Donnely, who works at the gallery was saying that the biggest thing she learnt today (she was observing Toril taking photos of each of our work and also taking a few snaps herself) was that a camera will not capture what the eyes can see, as you have the working of you brain and perspective adding to what you see, so what everyone sees is different. Toril is currently editing the pictures, I can’t wait to see them next week, and to share them on here!

Vitreous Slip

IMG_2057

This is the same slip used, but fired at different temperatures…

(from left) 1220 degrees

1140 degrees

1100 degrees

As you can see, they have decreased in size as the properties have fused and vitrified. There is a nice waxy finish on the 1220 firing, and I would consider this a success! One thing I will say is that I wish to spray gun the slip onto my actual pieces. Brushing on the slip isn’t doesn’t produce the texture I want. I want the pieces to be (specifically for the Ken Stradling collection) tactile, and the texture just isn’t there with brush on, it looks too similar to the wooden blocks I casted!

After speaking to Matt, he confirmed by doubts of using a spray gun to decorate the small building blocks: the pressure from the air would knock them over and they would be very fiddly to spray, probably catching more water than the actual slip. He suggested I use a latex make up sponge instead and dab the slip onto my blocks.

IMG_2116

This was taken yesterday before they went into a 1220 firing! They are still in the kiln as I type, cooling down. I am going into uni today to check up on them!!! You can see they have a really nice texture, from the songs I used to decorate them. Ahhh I can’t wait to see them!

For my summative assessment I want to make variantly textured building blocks, some sanded down and ultra smooth, and others bumpy. I think 3 different textures (including my ones above) would be good, and something achievable with the time I have left before we are assessed.

IMG_2067

Interestingly, I think this texture would be a fun one to incorporate, an example of serendipity. I coated an already fired vitreous slip coated cylinder in my salmon pink glaze and then putting it into a 1220 firing. Obviously this red glaze was intended for a 1100 firing, so it blistered from the the heat, but it is certainly a bumpy texture I could use!

I wanted to do a bit of research around the chemistry of vitreous slips, mainly fascination, it really is half way between bisque fired and glazed; so I did a little research online and looked back at my first year notes from when Duncan gave us lectures on the properties of clay, from the ground up.

A flux (zinc or copper to name a few) lowers the melting point of clay, meaning that glazes and slips will vitrify (melt and achieve that glassy effect) at a lower temperature than without the flux being present. Refractory materials, such as kaolin, ball clay and flint, do the exact opposite; that being that if for example, a decorative slip matures at a much cooler temperature than the clay is has been coated on, it may require some ball clay added to the mixture so that it needs more heat (which is what the clay underneath would require in this scenario) for it to fuse.

It’s worth noting that some elements behave differently depending on what kiln firing it is. Iron, a refractory material in oxidation, is a strong flux in reduction.

Understanding the science behind clay really aids the making process. If I knew that I needed to fire my pieces at a higher temperature, I wouldn’t have had needed to book so many kilns and so as many firings! But then again, it’s second year, I have time to learn these things in place for my final year of my degree.


Glazing

I had planned to glaze my building blocks… To put primary coloured slips on first, then a simple clear glaze over the top… But more often than not, I prefer my pieces before they’ve been glazed. I feel that glaze can take a way from a piece rather than add to it. It has the tendency to gloss over any interesting textures and to draw the eye to the shininess they produce, rather than the shape.

Also, people may be less inclined to touch them if they’re shiny, because a lot of breakable things are shiny, and it may act as a deterrent. Also there is the problem of stickiness that glaze brings. I would want to glaze all sides of my blocks, which would mean that one side would be directly on the kiln shelf, and when glaze melts, it sticks! This is because glaze contains lots of flux; which lowers the melting point of glass formers (the stuff which makes glaze shiny, such as silica). SO I could have used stilts, however, they would leave marks, and with marks comes a change in texture, smooth…then a rough patch. Not what I want.

I did glaze some pieces though to see what they’d look like and I have to say, I am glad I’m not glazing them for my final outcome. Not the look I’m going for: far too shiny and detractive of the form. Also, there are brush marks! I know I could’ve used the spray booth for them, but they are such tiny pieces and using a spray gun creates a lot of wastage. I am still  going to see what a few coats of glaze looks like instead of one though, a few extra layers can make a lot of difference in the depth of colour. I’m not a fan of this salmon colour for my pieces, it’s not red enough. I do like the aqua though, but it does need a few more layers. Doing these tests just keeps my options open: if I do end up deciding to glaze them, I have more of an idea of how I go about it.

What am I currently doing?

After going through my blog I realised I haven’t actually discussed what my current thoughts are about the pieces I am making! I’ve been so focused on making that I haven’t stopped and reflected on the blog, instead it’s been during tutorials. So as you may well be aware, second year ceramicists at my uni are taking part in a collaborative project with the Ken Stadling Collection in Bristol. This project has been ongoing since first term back in September 2015… and my work has been on quite a journey!

It’s gone from quite sculptural, phenomenological pieces to very paired down minimalist objects.

IMG_4336

IMG_1920

I felt like my piece wasn’t complete, it needed more. After speaking to Pete, he made me realise what was missing, and what would connect my subject area with field. As I have talked about, I created a geometric puzzle out of terracotta for our field module. This then invited the audience to engage with the object, to play.

All along I felt that something was missing from my building blocks, something was needed to bring it together, so they aren’t merely just some building blocks. Pete asked… what makes these different from the wooden ones you originally casted? Well, they sound different, they clink when they touch each other, it’s a lovely sound actually. So there is an essence of acoustics. Also, the weighting varies between the same shapes. Whereas the cut out wooden blocks are solid, some of the ceramic shapes are hollow, depending on how long I kept them in the slip cast mould. And last but not least, they are ceramic, they are breakable! A breakable toy who would’ve thought?! I suppose in some way I am bringing an idea of reassurance that one can handle these objects, they can play with them. Yes, they are made of a fragile material, but, so what if they break?

However, they are still, just building blocks, I need a hook, something which invites the audience to rearrange these blocks, to take action and play. Much like I did with field, by creating a puzzle, I want to do a similar sort of thing with my building blocks.

Then Pete grabbed one of my test pieces, a large terracotta cuboid with a semi- circle cut out. I say large, it is compared to my building blocks, it’s slab built and about 10 cm in diameter. And then, he started placing my cast cylinders in the semi- circle

A game! Yes, this was the something I’d been missing!

The plan is to construct 4 of these large shapes, keeping the terracotta colour, and the rustic feel, honing on the root importance of my art- to engage physical touch, for it to be tactile and textures, a contrast to the polished cast building blocks.

Many a kiln and slip

On the first week of May I started making vitreous slip, after consulting my tutor Natasha and Spencer (a fellow 2nd year) about them, I decided using slip will be the best way to decorate my building blocks. It should look slightly shiny and has a very interesting texture, not completely smooth but a tad shiny. On the 9th May, my test pieces came out of the kiln… And unfortunately I was disappointed, the vitreous slip is not how I wanted it to feel. It’s completely matte finish! However, the colours are good! I got something right… Well, apart from the orange. I was expecting a bright pumpkin orange, but it was more of an ochre. Not the look I was going for.

IMG_1978

Vitreous slip covered building blocks after a 1100 firing

IMG_1914

As I have put glaze on all sides, I am using stilts and silica sand, to prevent the glaze sticking my items to the kiln shelves. Also,  Im using a little tray just incase one of the glazes is extra runny, it will destroy the tray (which can be made again without hassle) instead of the kiln shelves, which are rather expensive!

IMG_1915

Each shelf is held up by 3 props (using 3 props is far more supportive than 4). We have lots of sizes to choose from. Generally it’s better to put the smaller items at the bottom and then the objects get bigger with each shelf.

IMG_1916

Every firing works best with a pyrometric cone, when the firing is expected to have reached temperature, one can check through the peephole and see whether the cone has bent. If it has bent it means it’s reached temp and can be switched off… There weren’t any small cones left so I had to use a big one! This firing was 1100 degrees.

IMG_2021

My yucky yellow slip. This pic was taken whilst I was in the process of putting a glaze on top off it and re-fire it!

As for the glazes I made the other day, I decided to put them on my cast shapes to see what they would look like. The turquoise and clear one worked well, but the pink wasn’t as nice. I’d say it was too “wish-washy” for the better word, I talk more about them in my Glazing post. So I am on the hunt for Duncan and I am going to ask him what I need to do next time for a successful result. Meanwhile I have spoken to Spencer and we discussed that I should try firing them again at a higher temperature.

I then spoke to Caroline, one of the tech dems, as I had no idea what temperature earthenware casting slip would go to… She suggested booking 2 kilns, one at 1140 degrees the other at 1220.  I came in this morning to do this.. and the test kilns I booked only go up to a maximum of 1160! What a bother! So, I am only doing the one firing today. There isn’t another test kiln until Monday. This is annoying, but I still have a bit of time until the deadline (being 26th May, it was originally 12th– then I would’ve panicked!).